Designing and constructing a garden room using timber cladding is an excellent way to create a beautiful, functional, and eco-friendly space. This guide will walk you through the process, highlighting the benefits of using Western Red Cedar, Thermo Wood, and Larch.
Step 1: Planning and Design
1.1. Determine Your Purpose
- Identify the primary use of your garden room (e.g., office, studio, relaxation space).
1.2. Choose Your Location
- Select a suitable location in your garden that offers the right balance of sunlight, shade, and accessibility.
1.3. Design the Layout
- Sketch the layout considering dimensions, windows, doors, and internal features.
1.4. Obtain Necessary Permissions
- Check local regulations and obtain any necessary building permits.
Step 2: Selecting Timber Cladding
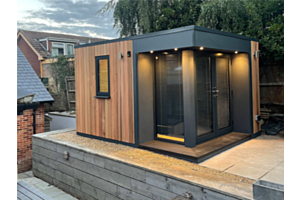
2.1. Western Red Cedar
- Benefits: Natural resistance to rot and insects, lightweight, and visually appealing with a rich, warm color.
- Ideal for: Modern, sleek designs with a natural aesthetic.
2.2. Thermo Wood
- Benefits: Enhanced durability and stability due to thermal modification, reduced moisture absorption, and environmental friendliness.
- Ideal for: Sustainable projects and areas with high humidity or variable weather conditions.
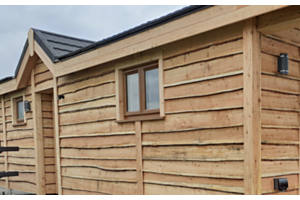
2.3. Larch
- Benefits: High density, natural resistance to decay, and attractive grain patterns.
- Ideal for: Rustic and traditional designs that emphasize natural wood texture.
Step 3: Foundation and Framing
3.1. Prepare the Foundation
- Choose between concrete slab, pier foundation, or timber sub-floor based on soil conditions and garden room size.
3.2. Construct the Frame
- Use treated timber for the structural frame to ensure longevity.
- Ensure the frame is level and square to support the cladding and roof properly.
Step 4: Installing Timber Cladding
4.1. Prepare the Cladding Boards
- Acclimatize the timber by storing it on-site for a few days.
- Treat the wood with a preservative if necessary.
4.2. Fix Battens to the Frame
- Install vertical or horizontal battens on the frame, ensuring adequate ventilation and moisture drainage behind the cladding.
4.3. Attach the Cladding
- Start at the base and work upwards.
- Use stainless steel nails or screws to prevent rust.
- Leave gaps for expansion and contraction to maintain the integrity of the cladding.
Step 5: Roofing and Insulation
5.1. Install the Roof
- Choose a roofing material that complements the timber cladding, such as felt, shingles, or metal sheets.
- Ensure proper insulation and waterproofing.
5.2. Insulate the Garden Room
- Use high-quality insulation materials in the walls, floor, and roof to maintain a comfortable temperature year-round.
Step 6: Windows and Doors
6.1. Select Energy-Efficient Windows and Doors
- Choose double or triple-glazed options for better insulation.
- Ensure they fit securely within the timber frame to prevent drafts and heat loss.
6.2. Install and Seal
- Fit windows and doors according to manufacturer instructions.
- Seal around the edges to prevent moisture ingress and improve energy efficiency.
Step 7: Interior and Exterior Finishing
7.1. Interior Finishing
- Install internal wall coverings, flooring, and ceiling finishes.
- Add electrical wiring, lighting, and any other utilities needed for your garden room’s purpose.
7.2. Exterior Finishing
- Apply a finish to the timber cladding (e.g., oil, stain, or paint) to protect it from weathering and UV damage.
- Landscape around the garden room to integrate it into the garden design.
Step 8: Maintenance
8.1. Regular Inspection
- Check the cladding, roof, and foundations annually for any signs of wear or damage.
8.2. Cleaning and Treatment
- Clean the exterior cladding with a mild detergent and water.
- Reapply protective treatments as recommended by the manufacturer.
Conclusion
Building a garden room with timber cladding using Western Red Cedar, Thermo Wood, or Larch can create a stunning and functional addition to your outdoor space. Each type of wood offers unique benefits, making them suitable for different design aesthetics and environmental conditions. By following this step-by-step guide, you can ensure your garden room is well-designed, durable, and beautifully integrated into your garden.


